What is a WhatsApp Sender?
A WhatsApp Sender is:- A dedicated phone number connected to WhatsApp Business
- Connected to an AI assistant for automated responses
- Capable of sending template messages and free-form replies
Number Type Options
When creating a WhatsApp sender, you can choose between two types of phone numbers:Platform Numbers
Use phone numbers purchased through our platform. We handle verification automatically using AI-assisted voice verification.Best for: Businesses wanting a dedicated business line with automated setup
External Numbers
Use your own mobile number. You verify ownership by receiving an SMS or voice call with a verification code.Best for: Businesses wanting to use an existing number they already own
Creating a WhatsApp Sender
Creating a WhatsApp sender starts with choosing your number type, then following the appropriate setup flow.Step 1: Choose Your Number Type
Navigate to WhatsApp Senders → Create Sender and select your preferred number type:- Platform Number — Use a number purchased from our platform (automated AI verification)
- External Number — Use your own mobile number (SMS/voice code verification)
Platform Number Setup
If you selected Platform Number, follow these steps:Step 2: Pre-Verify Your Phone Number
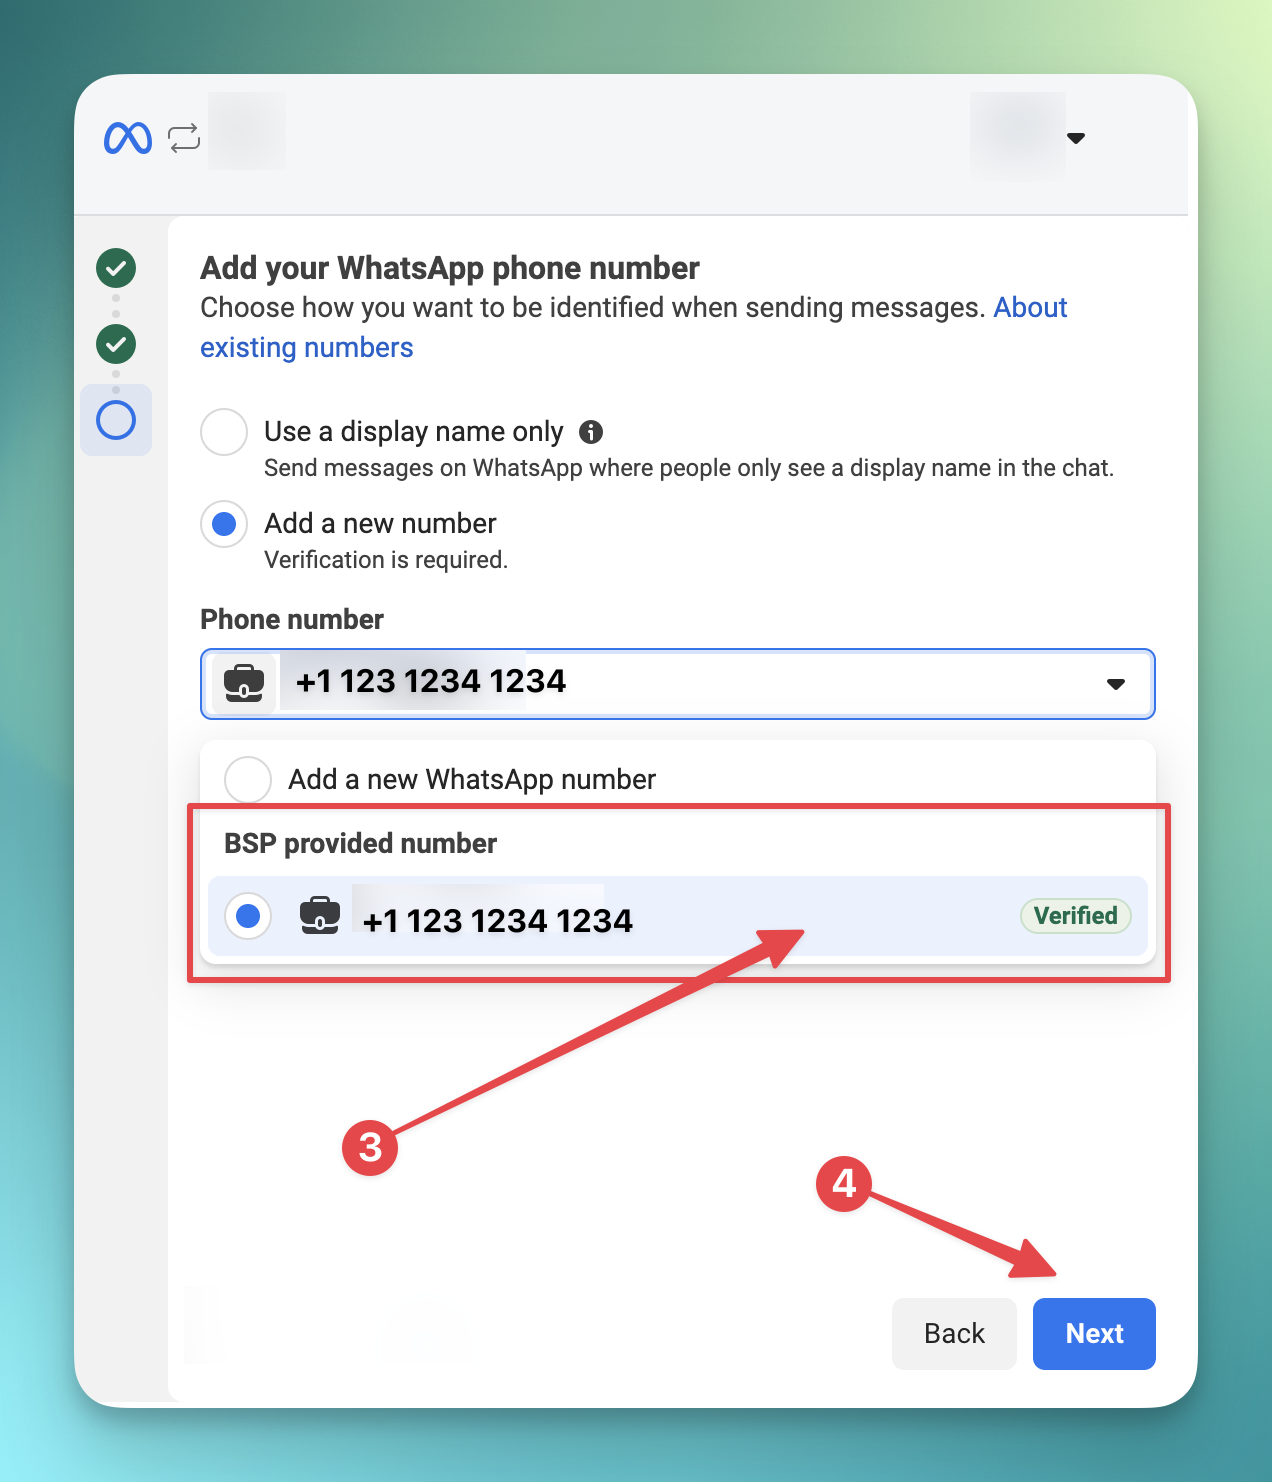
Before connecting to WhatsApp, your phone number must be verified with Meta.- Select an available phone number (only “normal” type numbers not already used for WhatsApp are shown)
- Enter a Display Name for your business (this will be shown to customers)
- Optionally add business profile information (about, description, address, category)
- Click Start Verification
Step 3: Select Your Verified Number
Once verification completes:- You’ll see your verified number in the “Verified Numbers Ready” section
- Select the number you want to connect
- Click Continue to WhatsApp Connection
Step 4: Connect to WhatsApp Business
This step connects your verified number to WhatsApp through Meta’s Embedded Signup flow.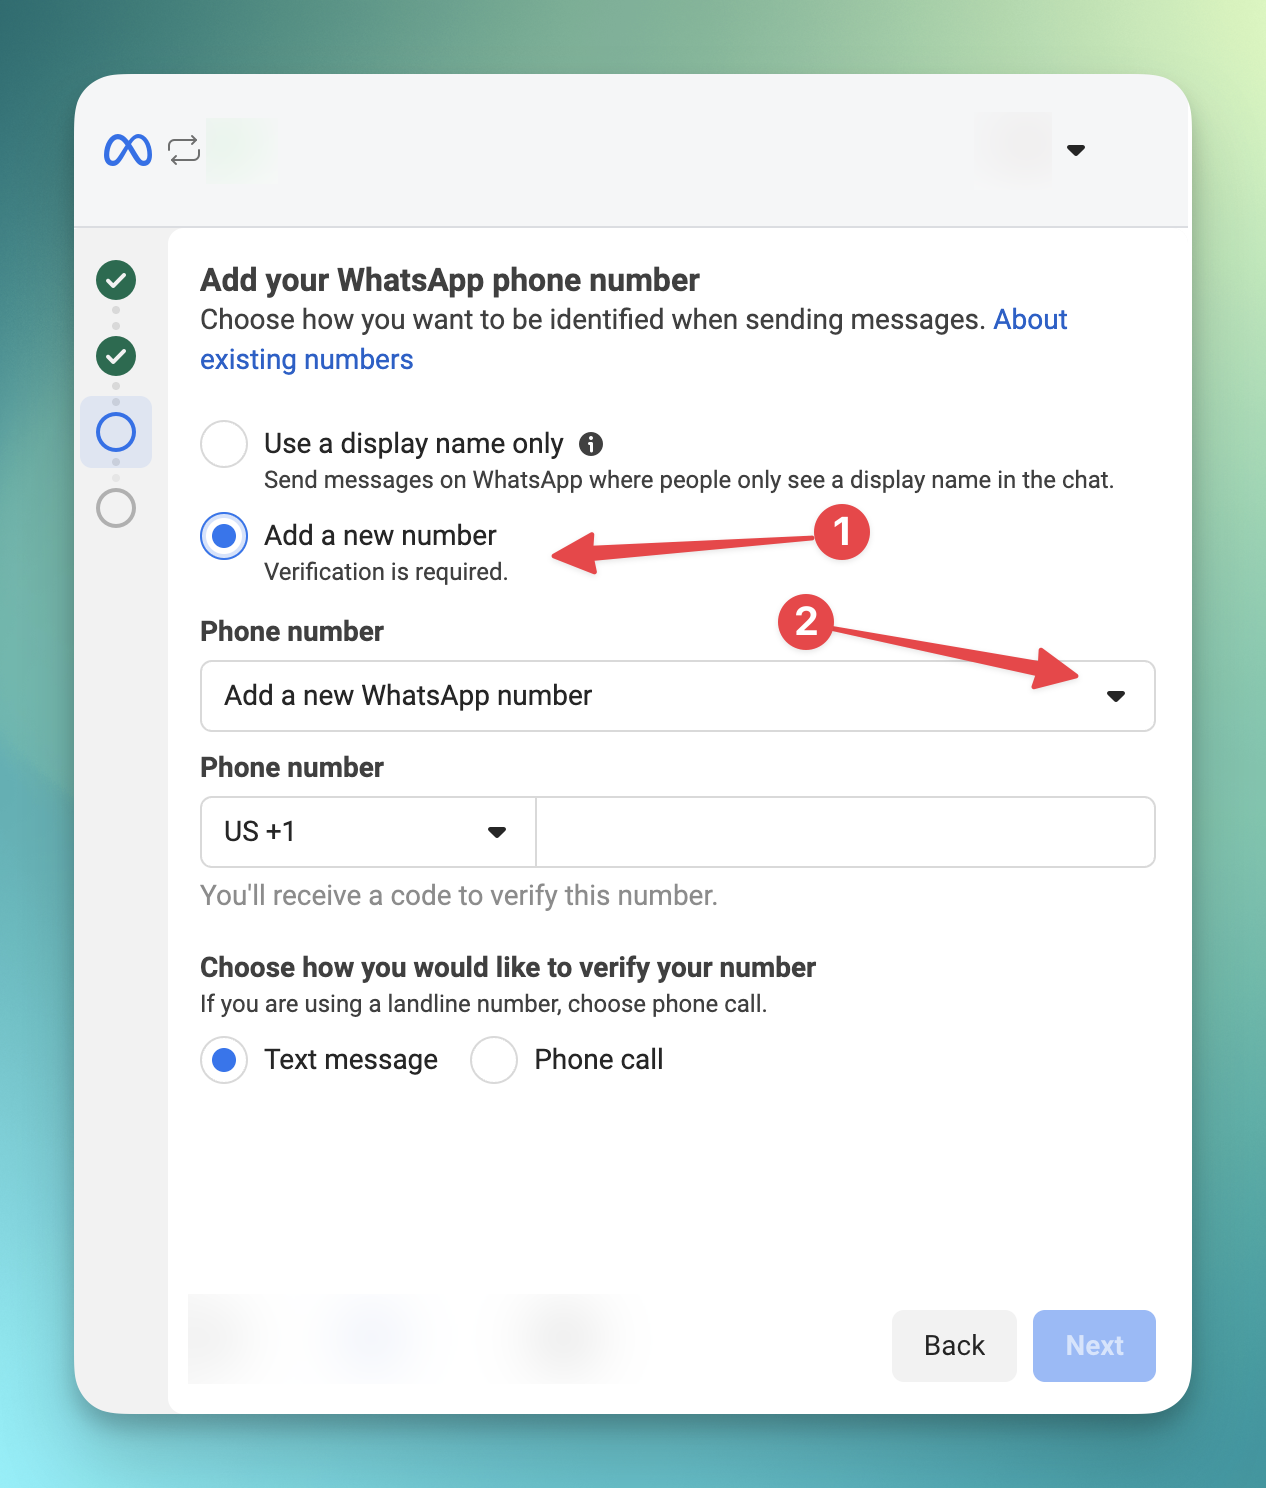
External Number Setup
If you selected External Number, follow these steps to connect your own mobile number.Requirements Before You Begin
Make sure you have the following ready:
- Phone accessible — You must have your phone nearby to receive a verification code
- SMS or calls enabled — Your number must be able to receive SMS messages or voice calls
- Not already on WhatsApp — This number must not be registered with WhatsApp or WhatsApp Business app
- Facebook account — You’ll need a Facebook account to complete the setup
Step 2: Enter Your Phone Number
- Enter your phone number in international format (e.g., +1 555 123 4567)
- Enter a Display Name for your business
- Click Continue
Step 3: Connect to WhatsApp Business
Click Login with Facebook to open Meta’s Embedded Signup flow. Follow these steps:1
Login with Facebook
A popup will open. Make sure popups are allowed for this site.
2
Create a WhatsApp Business Account
Follow the prompts to create a new WhatsApp Business Account. Don’t select an existing one.
3
Enter Your Phone Number
When prompted, enter the same phone number you provided in Step 2.
4
Verify with SMS or Voice Call
You’ll receive a 6-digit code via SMS or voice call. Enter it to verify your number.
5
Complete the Setup
Grant the required permissions and close the popup when finished. You’ll be redirected automatically.
Troubleshooting External Numbers
Popup blocked?
Popup blocked?
Allow popups for this site in your browser settings, then try again.
Not receiving verification code?
Not receiving verification code?
Wait 60 seconds, then try the voice call option. Make sure your phone has signal.
Number already registered?
Number already registered?
If this number is already on WhatsApp, you’ll need to delete that WhatsApp account first before you can use it with WhatsApp Business API.
Facebook login issues?
Facebook login issues?
Make sure you’re logged into the correct Facebook account, or try a different browser.
Sender Status
Your sender can have different statuses during operation:Sender Configuration
Connect an AI Assistant
Once your sender is online, connect an AI assistant to handle incoming messages automatically:- Edit your WhatsApp sender
- Select an assistant from the dropdown
- Enable AI Enabled toggle
- Save changes
Business Profile
Customize how your business appears to customers:- Display Name — Your business name shown in WhatsApp
- About — Short description (max 139 characters)
- Description — Detailed description of your business
- Address — Business address
- Business Category — Industry category (Automotive, Medical, Retail, etc.)
- Logo — Business logo image
- Banner — Banner image for your profile
- Websites — Links to your websites
- Contact Information — Additional email and phone contacts
Quality Rating & Messaging Limits
Meta tracks your messaging quality and adjusts your limits accordingly.Understanding Quality Rating
Your quality rating is based on:- Block rates (customers blocking your number)
- Spam reports
- Response rates
- Customer feedback
Messaging Limits
New senders start with limited capacity that increases with good quality:Best Practices
1. Choose the Right Number
Select a phone number from a country that matches your target audience. Customers are more likely to engage with local or familiar area codes.2. Set Up Your Display Name Carefully
Your display name appears in customer chats. Use your business name or a clear identifier that customers will recognize and trust.3. Connect an AI Assistant
Link an AI assistant to handle incoming messages automatically. This ensures customers get instant responses 24/7.4. Create Templates Early
Message templates require Meta approval which can take up to 24 hours. Create and submit your templates before you need them.5. Start with Quality Conversations
New senders have messaging limits that increase over time. Focus on quality conversations to build your sender reputation before scaling up.Troubleshooting
Verification Failed
If verification fails, Meta may have temporarily blocked requests. Wait a few minutes before retrying, or try a different phone number.Sender Stuck in Pending
If your sender stays in “Pending” status for more than a few minutes:- Check if you completed the Meta signup flow
- Ensure you selected the correct pre-verified number
- Contact support if the issue persists
Sender Suspended
If Meta suspends your sender:- Review the suspension reason in your sender details
- Address any policy violations
- Contact Meta support for appeals
Next Steps
- Learn about message templates and the approval process
- Set up automation triggers for WhatsApp conversations
- Review AI assistant configuration for optimal responses